Step-by-Step Guide from Site Survey to Commissioning
Introduction
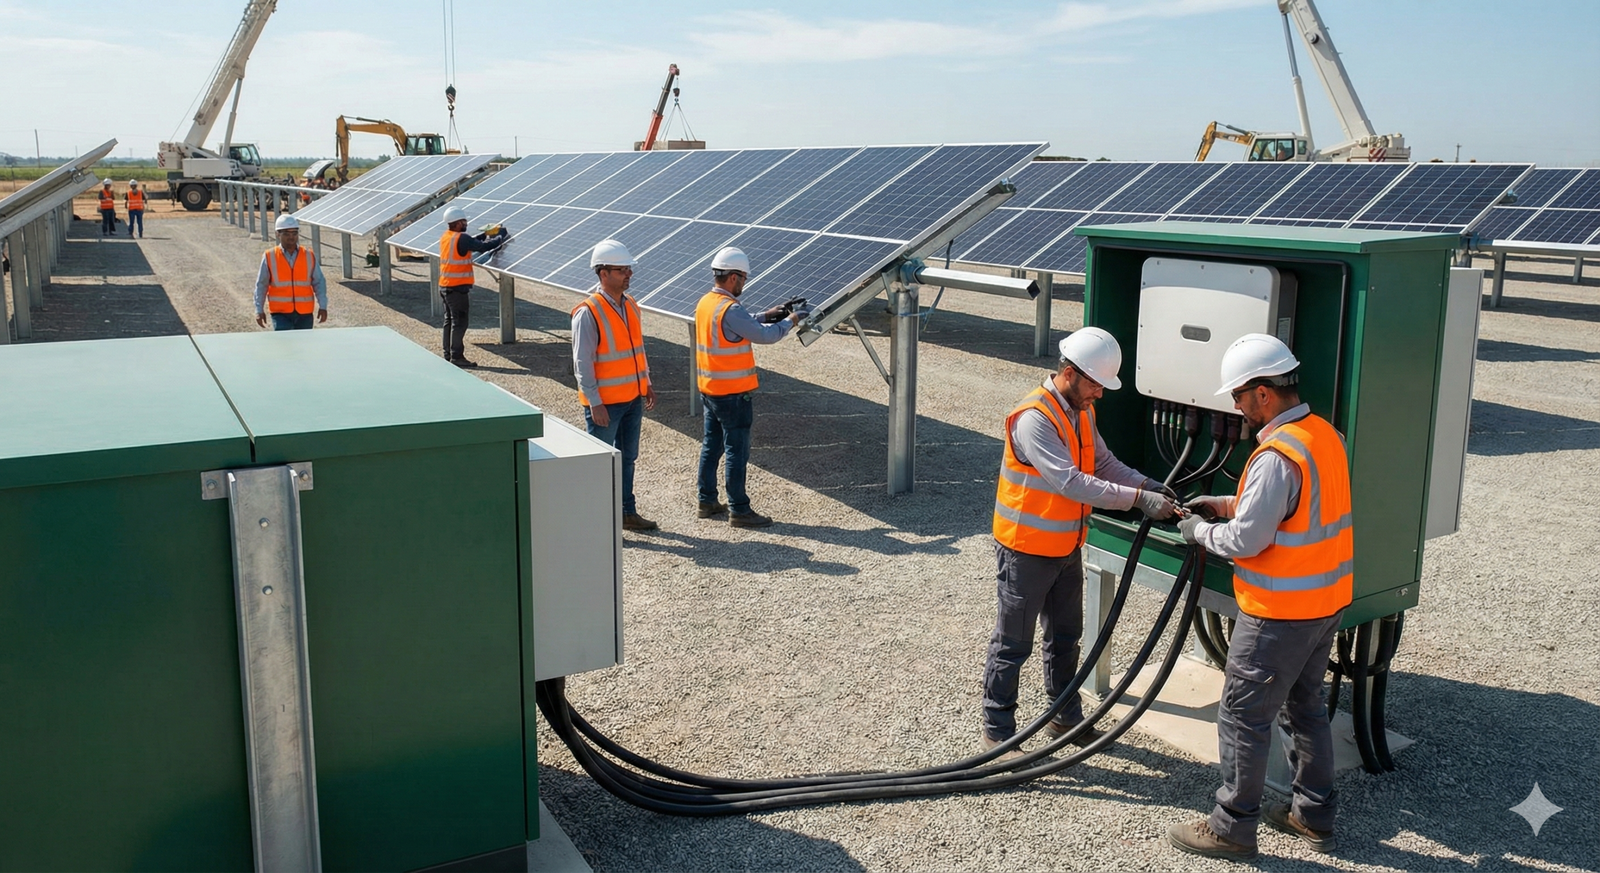
Solar energy is one of the most scalable renewable sources for clean electricity generation. But a solar project becomes successful only when it is planned, engineered, and executed with strict quality control. A utility-scale solar farm is not just panel mounting—it involves site feasibility, civil works, electrical design, grid integration, safety compliance, testing, commissioning, and long-term performance assurance.
This article explains the complete solar farm installation process step-by-step, from site survey to commissioning, and includes checklists, safety points, timeline, cost factors, and FAQs.
1) Solar Farm Installation Overview
A typical solar project includes:
- Site survey and feasibility study
- Engineering design (civil + electrical)
- Procurement of modules, inverters & BOS
- Structure and mounting system installation
- DC and AC electrical infrastructure installation
- Grid connectivity and synchronization
- Testing and commissioning
- Documentation and project handover
Depending on project size and grid readiness, utility-scale solar projects take 2 to 10 months on average.
2) Step 1 — Site Survey & Feasibility
2.1 Solar Resource Assessment
Solar projects depend on radiation availability.
Study includes:
- GHI / DNI analysis
- Seasonal radiation variation
- Weather and temperature impact
- Dust factor estimation
Output:
- expected annual generation
- performance ratio assumptions
- estimated output & financial feasibility
2.2 Topographical Survey
Used for:
- grading needs
- drainage layout
- mapping obstacles
- shading impact
2.3 Soil Investigation
Needed for:
- pile depth decision
- corrosion risk study
- foundation stability
2.4 Feasibility Deliverables
- site feasibility report
- preliminary layout
- generation estimate (AEP)
- basic cost estimation
3) Step 2 — Project Development & Approvals
3.1 Land Documentation
Key checks:
- legal ownership clarity
- lease agreements
- ROW for cabling and roads
3.2 Permissions & Regulatory Compliance
Includes:
- local approvals
- grid connectivity approval
- environmental permissions (if applicable)
3.3 Grid Feasibility Assessment
Confirms:
- nearest evacuation point
- required transformer sizing
- protection scheme needs
- grid capacity
4) Step 3 — Detailed Engineering & Design
4.1 Layout & String Design
Includes:
- module row spacing
- tilt angle optimisation
- string configuration
- inverter sizing
4.2 Structural Design
Depending on land and wind loads:
- fixed tilt structures
- trackers (if used)
4.3 Electrical Engineering
Includes:
- DC cable sizing
- AC cabling design
- SLD
- earthing & lightning protection
- protection relay scheme
4.4 SCADA & Monitoring Design
Includes:
- energy meters
- string monitoring
- inverter monitoring
- remote dashboard readiness
5) Step 4 — Procurement & Logistics
5.1 Key Solar Components
- PV modules
- inverters
- mounting structures
- DC/AC cables
- combiner boxes
- transformers
- switchgear
5.2 Logistics & Storage Planning
Includes:
- safe handling procedures (modules are fragile)
- storage yard setup
- inventory tagging and inspection
6) Step 5 — Site Preparation & Civil Works
6.1 Land Clearing & Grading
Done for:
- structure stability
- water drainage management
- vehicle movement
6.2 Road Development
Internal roads allow:
- module movement
- inverter/transformer transportation
6.3 Foundation / Pile Works
Includes:
- pile driving / RCC foundations
- alignment checks
- corrosion prevention measures
7) Step 6 — Mounting Structure Installation
7.1 Structure Assembly
Strict requirements:
- torque tightening standards
- row alignment checks
- wind load compliance
7.2 Tracker Setup (If Applicable)
For tracker systems:
- actuator installation
- controller wiring
- rotation testing
8) Step 7 — Module Installation
8.1 PV Module Mounting
Includes:
- safe lifting
- clamp tightening
- surface protection
8.2 Quality Checks During Module Installation
- micro-crack prevention
- clamp position verification
- module serial tracking
9) Step 8 — Electrical Installation (DC + AC)
9.1 DC Side Installation
Includes:
- DC cable laying
- string connections
- combiner boxes (SCBs)
9.2 Inverter Installation
Includes:
- inverter foundation setup
- ventilation clearance
- testing readiness
9.3 AC Side Installation
Includes:
- LT/HT panels
- transformers
- switchgear
- cable terminations
9.4 Earthing & Lightning Protection
Solar plants require:
- array earthing
- equipment earthing
- surge protection devices
10) Step 9 — Grid Integration & Evacuation
10.1 Substation Work
Includes:
- transformer installation
- breakers and relays
- CT/PT metering
- SCADA connectivity
10.2 Evacuation Line
Depending on scope:
- overhead line / underground cable
- bay extension
11) Step 10 — Testing & Commissioning
11.1 Pre-Commissioning Electrical Tests
- insulation resistance (IR)
- polarity check
- string testing
- continuity testing
- inverter diagnostics
- earthing resistance measurement
11.2 Trial Run & Performance Validation
Includes:
- PR testing
- output verification
- SCADA reporting verification
12) Project Handover & Documentation
Includes:
- as-built drawings
- test reports
- warranty documents
- O&M manuals
- commissioning report
✅ Solar Farm Installation Checklists
A) Pre-Execution Checklist
- feasibility study complete
- land agreements finalized
- grid approval initiated
- BOQ and drawings approved
- material delivery plan finalized
B) Structure Checklist
- row alignment checked
- torque specs verified
- anti-corrosion process done
- foundation strength verified
C) Electrical Checklist
- DC polarity verified
- inverter connections checked
- cable terminations tested
- relay settings confirmed
- earthing resistance recorded
D) Commissioning Checklist
- all IR tests passed
- inverter sync tested
- SCADA reporting active
- PR baseline recorded
- handover documents prepared
✅ Safety Points in Solar Installation
Key Risks
- DC shock hazard
- fire risk due to loose connections
- working at height (if rooftop/raised)
- lifting & handling modules
- cable trench hazards
Mandatory Safety Practices
✅ PPE mandatory (helmets, gloves, shoes)
✅ DC isolation and LOTO systems
✅ fire extinguishers at inverter zones
✅ trained electricians only
✅ cable management + proper terminations
✅ insulation and thermal checks
✅ Timeline for Solar Farm Installation
Indicative timeline:
- Survey & Feasibility: 2–4 weeks
- Design & Approvals: 2–8 weeks
- Procurement: 4–10 weeks
- Civil + Structures: 4–12 weeks
- Module + Electrical: 4–12 weeks
- Commissioning: 2–4 weeks
Total typical: 2 to 6 months (can vary heavily).
✅ Cost Factors (What Impacts Solar Project Cost?)
- Type of Modules (Mono PERC / TOPCon / Bifacial)
- Mounting System (fixed vs tracker)
- Inverter Type (central vs string)
- Land preparation (grading/drainage)
- Evacuation distance and substation scope
- Cable and BOS quality
- Labour and execution speed
- Compliance and documentation scope
✅ FAQs
Q1. How long does a solar farm take to install?
Most projects take 2 to 6 months, depending on size and grid readiness.
Q2. What is the most critical installation step?
Electrical connections (DC polarity and terminations). Poor workmanship causes major failures.
Q3. Can a solar farm work without grid connection?
Only if there is storage (battery). Utility scale requires grid evacuation for commissioning.
Q4. What are the most common quality issues?
Loose terminations, improper earthing, wrong DC polarity, and poor cable management.
Q5. How do we ensure long-term performance?
Quality installation + monitoring dashboard + preventive maintenance + timely cleaning.
Conclusion
Solar energy is clean, scalable, and profitable—when executed correctly. A successful solar farm requires accurate survey, strong design, disciplined EPC execution, strict safety compliance, and performance validation during commissioning.
When each stage is done with quality control, a solar plant can perform reliably for 25+ years.